소스코드 뜯어보기(고급)
Hook은 어디에 구현되어 있나
useState는 어디에 구현되어 있을까요??
가장 바깥부터 거슬러 올라가면서 찾아보도록 합시다.
우리는 useState를 다음과 같이 import 해서 사용합니다.
import {useState} from 'react';react package를 살펴봅시다.
export {useState} from "./ReactHooks"ReactHooks.js를 살펴봅시다.
export function useState<S>(initialState: (() => S) | S) {
  const dispatcher = resolveDispatcher();
  return dispatcher.useState(initialState);
}
어디선가 dispatcher를 가져오고, 그 안의 useState method를 실행해주는 것이었네요.
resolveDispatcher의 코드를 살펴봅시다.
// [react/packages/react/src/ReactHooks.js](https://github.com/facebook/react/blob/v16.12.0/packages/react/src/ReactHooks.js#L77-L80) > resolveDispatcher

import ReactCurrentDispatcher from './ReactCurrentDispatcher';

function resolveDispatcher() {
  const dispatcher = ReactCurrentDispatcher.current;
  invariant(
    dispatcher !== null,
    'Invalid hook call. Hooks can only be called inside of the body of a function component. This could happen for' +
      ' one of the following reasons:\n' +
      '1. You might have mismatching versions of React and the renderer (such as React DOM)\n' +
      '2. You might be breaking the Rules of Hooks\n' +
      '3. You might have more than one copy of React in the same app\n' +
      'See https://fb.me/react-invalid-hook-call for tips about how to debug and fix this problem.',
  );
  return dispatcher;
}
오,, hook 실행 원칙을 지키지 않을 시 React가 경고 문구를 보여준다고 앞서 말했었는데,
그 경고 문구를 여기서 확인 할 수 있습니다.
하지만 아직 dispatcher 구현체가 무엇인지 확인하지 못했습니다.
ReactCurrenDispatcher 는 어디서 오는 것일까요??
const ReactCurrenDispatcher={
  current: null : null | Dispatcher
};

export default ReactCurrentDispatcher;
OMG,, 이게 끝입니다.
이정표를 따라 왔지만 벽에 막혀버린 이 기분..
그렇다면 어디선가 다음과 같은 할당을 수행한다는 얘기가 되겠습니다.
ReactCurrentDispatcher.current = something
할당은 React 코어 패키지에서 직접 수행하지 않습니다.
React reconciler가 Shared package를 통해 동적으로 구현체를 주입합니다.
리액트 패키지 구조에 관해서는 좀 더 공부해서, 별도의 포스트로 작성해 두겠습니다.
훅이 개발자에게 도달되는 흐름은 다음과 같다고 합니다.
(React 톺아보기 게시물에서 인용하였습니다. 감사합니다.)
reconciler
-> shared/ReactSharedInternal
-> react/ReactSharedInternal
-> react/ReactCurrentDispatcher
-> react/ReactHooks
-> react
-> 개발자
hook은 reconciler가 renderWithHooks를 수행하면서 주입됩니다.
(함수의 동작을 유추할 수 있는 아름다운 naming,,)
function renderWithHooks(
	current: Fiber | null,
	workInProgress: Fiber,
	Component: any,
) {
  nextCurrentHook = current !== null ? current.memoizedState : null;
  ReactCurrentDispatcher.current =
      nextCurrentHook === null
        ? HooksDispatcherOnMount
        : HooksDispatcherOnUpdate;
  /* ... */
}
우리가 원하는 dispatcher 할당문을 찾은 것 같습니다!
사전 지식 : Fiber
추후 포스트에서 자세하게 살펴보겠지만, 간략하게 설명해야할 부분이 있습니다.
바로 current와 workInProgress 에 대해서입니다.
익히 들어 알고 있듯이, React는 Virtual DOM(이하 VDOM) 을 통해 컴포넌트를 관리합니다.
우리가 작성하는 함수형 컴포넌트는 단순히 JSX를 return하는 함수일 뿐입니다.
이 JSX는 babel을 통해 react.createElement(…)로 변환되어 React element가 됩니다.
아래 컴포넌트는,
<Greeting name="Taylor" />아래와 같은 React element로 변환됩니다. (리액트 공식 문서 참조)
{
  type: Greeting,
  props: {
    name: 'Taylor'
  },
  key: null,
  ref: null,
}
React element는 VDOM에 올라가기 전에, React Fiber로 변환됩니다.
function FiberNode(
  key: null | string,
  mode: TypeOfMode,
  ...
) {
  // Instance
  this.key = key;
  this.elementType = null;
  this.type = null;
  this.stateNode = null;

  // Fiber
  this.return = null;
  this.child = null;
  this.sibling = null;
  this.ref = null;

  this.updateQueue = null;
  this.memoizedState = null;

  // Effects
  this.effectTag = NoEffect;
  this.nextEffect = null;
  this.firstEffect = null;
  this.lastEffect = null;

  // ...
}
React는 모든 컴포넌트를 FiberNode로 만들고, 이를 tree로 만들어 VDOM을 관리합니다.
또, React는 이 Fiber tree를 current와 workInProgess 두 트리로 병렬 관리합니다.
VDOM에 반영된 tree가 current이고,
변경이 필요한 부분은 workInProgress에서 작업합니다.
workInProgress tree는 current에서 자기복제한 tree이며,
render phase에서 작업 후 commit phase를 지나 current로 병합됩니다.
다시 reconciler의 renderWIthHooks로 돌아갑시다.
0. renderWithHooks
function renderWithHooks(
	current: Fiber | null,
	workInProgress: Fiber,
	Component: any,
):any {
	nextCurrentHook = current !== null ? current.memoizedState : null;
	ReactCurrentDispatcher.current =
      nextCurrentHook === null
        ? HooksDispatcherOnMount
        : HooksDispatcherOnUpdate;
    /* ... */
}
이제 current와 workInProgress라는 인자가 무엇인지 알 것 같습니다.
current가 null이라는 것은,
render 한 이력이 없다는 것을 의미하고,
mount 단계를 의미합니다.
ReactCurrentDispatcher.current가,
컴포넌트 mount 단계에서는 HooksDispatcherOnMount를,
컴포넌트 update 단계에서는 HooksDispatcherOnUpdate를 사용한다는 것을 알 수 있습니다.
update 단계에서, 기존에 initialize 해 두었던 hook을 재사용(최적화)하려는 의도를 엿볼 수 있네요.
const HooksDispatcherOnMount: Dispatcher = {
  useState: mountState,
  useReducer: mountReducer,
};

const HooksDispatcherOnUpdate: Dispatcher = {
  useState: updateState,
  useReducer: updateReducer,
};
mountState, updateState를 분석하기 전에,
updateState의 구조를 가볍게 살펴봅시다.
function updateState<S>(
  initialState: (() => S) | S,
): [S, Dispatch<BasicStateAction<S>>] {
  return updateReducer(basicStateReducer, initialState);
}
updateReducer를 그대로 사용하는 것 보이시나요??
그렇습니다.
useReducer와 useState는 동일한 업데이트 구현체를 사용하는 것을 알 수 있습니다.
1. mountState
function mountState<S>(
  initialState: (() => S) | S,
): [S, Dispatch<BasicStateAction<S>>] {
  const hook = mountWorkInProgressHook();

  if (typeof initialState === 'function') {
    initialState = initialState();
  }
  hook.memoizedState = hook.baseState = initialState;

  const queue = (hook.queue = {
    last: null,
    dispatch: null,
    lastRenderedReducer: basicStateReducer,
    lastRenderedState: initialState,
  });

  const dispatch: Dispatch<BasicStateAction<S>> =
    (queue.dispatch = (dispatchAction.bind(
      null,
      // Flow doesn't know this is non-null, but we do.
      currentlyRenderingFiber: Fiber,
      queue,
    ): any));

  return [hook.memoizedState, dispatch];
}
마지막에 return하는 배열이,
우리가 그렇게 찾던 useState hook의 반환값입니다.
const [state, setState] = useState(initialValue);
mountState에서 살펴볼 부분은 크게 3가지입니다.
- hook에 대한 정보를 기록할 Hook 객체 생성 (4번 라인)
- 초기값 결정 (6-9 번 라인)
- dispatch(setState) 함수 (18-24번 라인)
Hook 객체 생성
const hook = mountWorkInProgressHook();function mountWorkInProgressHook(): Hook {
const hook: Hook = {
memoizedState: null,
baseState: null,
baseQueue: null,
queue: null,
next: null,
};
if (workInProgressHook === null) {
// This is the first hook in the list
currentlyRenderingFiber.memoizedState = workInProgressHook = hook;
} else {
// Append to the end of the list
workInProgressHook = workInProgressHook.next = hook;
}
return workInProgressHook;
}- 이전에 만들어진 hook이 없을 때, 즉 컴포넌트 내 첫번째 hook일 때
- hook 객체를 만들어 컴포넌트 Fiber의 memoizedState에 추가합니다.
- 이미 존재할 때, 즉 컴포넌트 내 2번째 이상 hook일 때
- 직전 hook의 next에 현재 hook을 추가합니다.
hook들이 linked list로 관리되고 있음을 알 수 있습니다.
(이전 포스팅에서는 이해를 돕기 위해 배열과, cursor를 사용했었습니다.)
linked list로 관리하면, cursor와 같은 부가적인 변수 사용을 줄일 수 있습니다.
초기값 결정
useState로 초기값을 지정할 때, 우리는 두 가지 방식을 사용할 수 있습니다.
useState(3)과 같이 값을 바로 전달하는 방식useState(()=>getLargeData())와 같이 초기값을 결정할 함수를 전달하는 방식- 이 때 전달하는 함수를
initializer function이라고 합니다.
- 이 때 전달하는 함수를
참고 : React 공식 문서에서 설명하는 initializer function
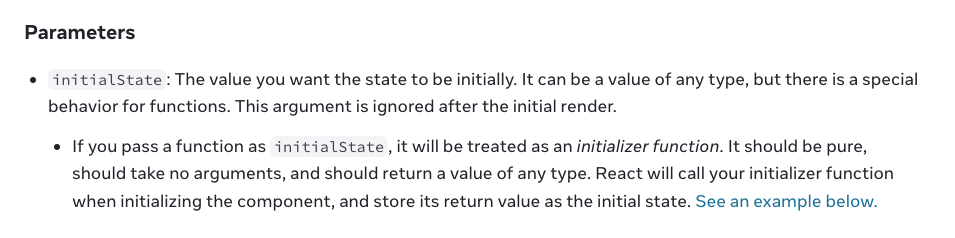
initializer function을 전달하는 경우,
typeof initialState === 'function' 조건문에서 걸려,
해당 함수를 실행한 결과를 현재 hook의 초기값으로 설정합니다.
그렇지 않은 경우, 전달한 값을 현재 hook의 초기값으로 설정합니다.
dispatch 함수
dispatchAction 함수의 큰 흐름은 다음과 같습니다.
function dispatchAction(...) {
  if (render phase에서 dispatch가 발생){
    render phase에서 발생한 update들을 renderPhaseUpdates의 queue에 순서대로 담는다.
  } else {
    stale 상태에서 발생한 update를 hook.queue의 마지막에 연결한다
    if (이전에 업데이트가 발생한 적이 없음) { // 최적화 진행
      새로 발생한 update를 기존 state에 적용
      적용 전후 state에 차이가 없다면, 아무것도 하지 않고 return (최적화)
    }
    VDOM 업데이트 스케줄링
  }
}대기열에 쌓여 있는 update 를 종합하여 새로운 state를 얻는 것은 다음 rendering입니다.
위 함수의 각 부분을 하나하나 살펴봅시다.
1. render phase에서 dispatch가 발생
if(renderPhaseDispatch){
	const update: Update = {
		action,
		eagerReducer: null,
		eagerState: null,
		next: null,
	};

	if (renderPhaseUpdates === null) {
		renderPhaseUpdates = new Map();
	}

	const firstRenderPhaseUpdate = renderPhaseUpdates.get(queue);

	if (firstRenderPhaseUpdate === undefined) {
		renderPhaseUpdates.set(queue, update);
	} else {
		let lastRenderPhaseUpdate = firstRenderPhaseUpdate;
		while (lastRenderPhaseUpdate.next !== null) {
			lastRenderPhaseUpdate = lastRenderPhaseUpdate.next;
		}
		lastRenderPhaseUpdate.next = update;
	}
}- 발생한 업데이트 정보를 담아 update 객체 생성 (2-7번 라인)
- renderPhaseUpdates.queue (linked list)의 마지막에, 방금 생성한 update 객체 연결 (22번 라인)
- renderPhaseUpdates가 없다면, 새로 Map을 만들고,
update 객체를 head로 하는 linked list(queue)를 만들어 Map에 삽입 (10,16번 라인)
2. stale 상태에서 dispatch 발생
else {
	const update: Update = {
		action,
		eagerReducer: null,
		eagerState: null,
		next: null,
	};

	const last = queue.last;
	if (last === null) {
		update.next = update;
	} else {
		const first = last.next;
		if (first !== null) {
			update.next = first;
		}
		last.next = update;
	}
	queue.last = update;

	if (이전에 업데이트 발생한 적 없음){
      const lastRenderedReducer = queue.lastRenderedReducer;
      if (lastRenderedReducer !== null) {
        let prevDispatcher;
        const currentState = queue.lastRenderedState;
        const eagerState = lastRenderedReducer(currentState, action);
        update.eagerReducer = lastRenderedReducer;
        update.eagerState = eagerState;
        if (is(eagerState, currentState)) {
          return;
        }
      }
	  scheduleWork(fiber, expirationTime);
  }
}- 발생한 업데이트 정보를 담아 update 객체 생성 (2-7번 라인)
- queue의 tail 탐색 (제일 last)
- 없다면, update 객체 스스로를 head, tail로 하는 원형 linked list 생성 (11번 라인)
- 있다면, 제일 마지막에 update 객체 연결 (아직 원형 연결 리스트인 상태) (17번 라인)
- 이전에 업데이트가 발생했던 적이 없다면,
- 업데이트를 적용해본다. (26번 라인)
- 적용 전후 상태값이 다르지 않다면 바로 리턴 (최적화) (29번 라인)
- 아니라면, Fiber 업데이트를 스케줄링 (33번 라인)
여기서의 queue는, mountState 함수에서 생성한 hook.queue입니다.
원형 linked list로 관리하는 이유는 다음 updateState 구현체에서 살펴봅니다.
mountState 구현체 요약
- 관리할 hook 객체를 생성하고,
Fiber.memoizedState에 연결 - 초기값 생성
dispatchAction함수를 생성- stale 상태에서 발생한 업데이트들을
hook.queue에 연결- 업데이트를 적용해본
eagerState와 현재 state 가 같다면, 스케줄링하지 않는다.
- 업데이트를 적용해본
- render phase에서 발생한 업데이트들을
renderPhaseUpdates.queue에 연결
- stale 상태에서 발생한 업데이트들을
[초기값, dispatchAction]을 배열로 반환
2. updateState
function updateState<S>(
	initialState: (() => S) | S,
): [S, Dispatch<BasicStateAction<S>>] {
	return updateReducer(basicStateReducer, initialState);
}

function basicStateReducer<S>(state: S, action: BasicStateAction<S>): S {
  return typeof action === 'function' ? action(state) : action;
}
앞서 말한대로, useReducer와 동일한 update 구현체를 사용합니다.
updateReducer의 흐름을 살펴봅시다.
function updateReducer<S, I, A>(
  reducer: (S, A) => S,
  initialArg: I,
  init?: I => S,
): [S, Dispatch<A>] {
  const hook = updateWorkInProgressHook();

  const queue = hook.queue;
  queue.lastRenderedReducer = reducer;

  if (리렌더링 단계) {
    const dispatch: Dispatch<A> = (queue.dispatch: any);
    if (renderPhaseUpdates 에 update가 쌓여 있음) {
      쌓여 있는 update를 종합하여 newState 계산
      return [newState, dispatch];
    }
    return [hook.memoizedState, dispatch];
  }
  hook.queue에 쌓여있는 update들을 종합하여,
  새로운 state를 hook.memoizedState에 저장

  const dispatch: Dispatch<A> = (queue.dispatch: any);

  return [hook.memoizedState, dispatch];
}
여기서도 마찬가지로, [현재 상태, dispatch] 를 return 합니다.
updateState에서 살펴볼 부분은 크게 3가지입니다.
- 기존 hook 객체 조회 및 업데이트 (6번 라인)
- state 값 업데이트 (14, 20번 라인)
- dispatch 함수 (22번 라인)
기존 Hook 객체 업데이트
const hook = updateWorkInProgressHook();function updateWorkInProgressHook(): Hook {
if (nextWorkInProgressHook !== null) {
// There's already a work-in-progress. Reuse it.
workInProgressHook = nextWorkInProgressHook;
nextWorkInProgressHook = workInProgressHook.next;
currentHook = nextCurrentHook;
nextCurrentHook = currentHook !== null ? currentHook.next : null;
} else {
// Clone from the current hook.
currentHook = nextCurrentHook;
const newHook: Hook = {
memoizedState: currentHook.memoizedState,
baseState: currentHook.baseState,
queue: currentHook.queue,
baseUpdate: currentHook.baseUpdate,
next: null,
};
if (workInProgressHook === null) {
// This is the first hook in the list.
workInProgressHook = firstWorkInProgressHook = newHook;
} else {
// Append to the end of the list.
workInProgressHook = workInProgressHook.next = newHook;
}
nextCurrentHook = currentHook.next;
}
return workInProgressHook;
}
요약하자면 다음과 같습니다.
- 업데이트 발생 후 컴포넌트 첫 호출이라면, 기존 hook 객체를 복사하여 새로운 Hook 생성
- 아니라면, 복사 생성해둔 위 Hook 재사용
기존 hook을 그대로 사용하지 않고 복사해서 사용하는 이유는,
여러 이유로 컴포넌트 렌더링이 중단, 취소될 경우가 있기 때문입니다.
이 경우 작업중이던 객체를 rollback 시키는 것보다는
임시 작업 객체를 버리는 것이 더 효율적이기 때문에
작업용 객체를 복사 생성하는 것입니다.
state 값 update
1. 리렌더링 단계가 아닌 경우
const last = queue.last;
const baseUpdate = hook.baseUpdate;
const baseState = hook.baseState;
let first;

if (baseUpdate !== null) {
  if (last !== null) {
    last.next = null;
  }
  first = baseUpdate.next;
} else {
  first = last !== null ? last.next : null;
}

if (first !== null) {
  let newState = baseState;
  let newBaseState = null;
  let newBaseUpdate = null;
  let prevUpdate = baseUpdate;
  let update = first;
  do {
    const action = update.action;
    newState = reducer(newState, action);
    prevUpdate = update;
    update = update.next;
  } while (update !== null && update !== first);

  hook.memoizedState = newState;
  hook.baseUpdate = newBaseUpdate;
  hook.baseState = newBaseState;

  queue.lastRenderedState = newState;
}

const dispatch: Dispatch<A> = (queue.dispatch: any);

return [hook.memoizedState, dispatch];- hook.queue에 쌓여있는 update를 순차적으로 소모하여 newState를 계산 (21-26번 라인)
여기서 baseUpdate, baseState를 짚고 넘어갑시다.
앞에서 살펴본 dispatchAction 함수에서,
stale 상태에서 발생한 update는 hook.queue에 쌓인다고 했습니다.
매번 업데이트가 일어날때마다, 업데이트 목록을 처음부터 적용하는 것은 매우 비효율적일 것입니다.
또 이미 소모된 update를 중복 처리하여 문제가 발생합니다.
따라서 가장 마지막으로 적용한 업데이트(baseUpdate)와,
그 업데이트까지 적용된 state 값(baseState)를 따로 기억해두는 것입니다.
최초의 hook.baseUpdate, hook.baseState는 null 이므로,
이 두 포인트의 사용은,
최초에 한 번은 업데이트가 수행되어 이 두 포인트가 null이 아니게 된 이후에 가능합니다.
queue는 queue.last 로 queue의 마지막 update만을 기억하는데,
이러면 update list의 첫 번째 업데이트를 알 수 없습니다.
따라서 원형 리스트로, tail(last)의 next가 head를 가리키게 함으로써 첫 시작(head)를 알 수 있는 것입니다.
이 방법으로 head부터 업데이트를 최초 1회 수행하고,
baseUpdate, baseState를 갱신하고,
이제는 필요 없어진 원형 리스트의 연결을 끊는 것입니다. (8번 라인)
2. 리렌더링 단계인 경우
const dispatch: Dispatch<A> = (queue.dispatch: any);
if (renderPhaseUpdates !== null) {
  const firstRenderPhaseUpdate = renderPhaseUpdates.get(queue);
  if (firstRenderPhaseUpdate !== undefined) {
    renderPhaseUpdates.delete(queue);
    let newState = hook.memoizedState;
    let update = firstRenderPhaseUpdate;
    do {
      const action = update.action;
      newState = reducer(newState, action);
      update = update.next;
    } while (update !== null);

    hook.memoizedState = newState;
    if (hook.baseUpdate === queue.last) {
      hook.baseState = newState;
    }

    queue.lastRenderedState = newState;

    return [newState, dispatch];
  }
}
return [hook.memoizedState, dispatch];- render phase에서 발생한 update가 renderPhaseUpdates.queue 에 쌓여 있습니다.
- 이 update들을 순차적으로 적용하여 newState를 얻습니다. (8-12번 라인)
dispatchAction 함수는 mount 단계에서 생성했던 함수를 동일하게 사용합니다.
updateState 구현체 요약
- 기존 hook 객체를 복사하여 새로운 hook 객체를 생성하고,
Fiber.memoizedState에 연결 - state 업데이트
- stale 상태에서 발생하여 쌓인 업데이트들 (
hook.queue)을 순차 소모하여 state 업데이트 - render phase에서 발생하여 쌓인 업데이트들(
renderPhaseUpdates.queue)를 순차 소모하여 state 업데이트
- stale 상태에서 발생하여 쌓인 업데이트들 (
dispatchAction함수는 mountState에서 만든 함수를 그대로 사용[업데이트된 state, dispatchAction]을 배열로 반환
간단한 예시로 이해하기
다음과 같은 컴포넌트가 있다고 생각해 봅시다.
const ExampleComponent = () =>{
	const [a, setA] = useState(0);
	const [b, setB] = useState(()=>true);
	return (
		<button onClick={()=>{setB(()=>false)}}/>
	)
}
최초 Component가 rendering될 때에는, mountState가 실행됩니다.
실행 결과, ExampleComponent의 Fiber node의 memoizedState는 다음과 같습니다.
// Fiber.memoizedState ===
{
	memoizedState: 0,
	baseState: 0,
	baseUpdate: null,
	queue: {
		last: null,
		dispatch: dispatchAction.bind(...),
		lastRenderedReducer: basicStateReducer,
		lastRenderedState: 0
	},
	next: {
		memoizedState: true,
		baseState: true,
		baseUpdate: null,
		queue: {
			last: null,
			dispatch: dispatchAction.bind(...),
			lastRenderedReducer: basicStateReducer,
			lastRenderedState: true
		},
		next: {
			// 만약 hook이 더 있다면
			memoizedState: ...,
			...
		}
	}
}
여러 hook들이 순차적으로, next 속성을 통해 연결되어 있는 linked list의 모습을 볼 수 있습니다.
Fiber.memoizedState.next가 두번째 hook을 가리키고 있으므로,
Fiber.memoizedState 자체는 첫 번째 hook이 됩니다.
따라서, Fiber.memoizedState는 그 자체로 hook이라고 생각해도 될 것 같습니다.
여기서, button을 클릭해봅시다. (setB(false))
두번째 hook의 상태는 다음과 같아집니다.
{
	memoizedState: true,
	baseState: true,
	baseUpdate: null,
	queue: {
		last: {
			expirationTime: 1073741823,
			action: ()=>false,
			eagerReducer: basicStateReducer(state, action),
			eagerState: false, // updated!
			next: { /* last 자기 자신 */},
		},
		dispatch: dispatchAction.bind(...),
		lastRenderedReducer: basicStateReducer,
		lastRenderedState: true
	},
	next: null
}
queue.last.eagerState의 값이 memoizedState 값과 다르므로,
scheduleWork(fiber, expirationTime) 가 실행됩니다.
그 결과, ExampleComponent 함수가 새로 호출됩니다.
hook.queue에 지정되어있는 update list를 모두 소모하면,
Fiber의 memoizedState 값은 다음과 같아집니다.
{
	memoizedState: false, // updated!
	baseState: false, // updated!
	baseUpdate: {
		expirationTime: 1073741823,
		action: ()=>false,
		eagerReducer: basicStateReducer(state, action),
		eagerState: false,
		next: null, // circle 끊어짐
	},
	queue: {
		last: {
			expirationTime: 1073741823,
			action: ()=>false,
			eagerReducer: basicStateReducer(state, action),
			eagerState: false,
			next: null // circle 끊어짐
		},
		dispatch: dispatchAction.bind(...),
		lastRenderedReducer: basicStateReducer,
		lastRenderedState: false
	},
	next: null
}
만약 이 상태에서 버튼을 다시 클릭하면 어떻게 될까요?
mountState > dispatch함수 > stale 상태에서 dispatch 발생 에서 살펴본 바와 같이,
업데이트된 queue.laste.eagerState와
currentState(memoizedState) 값이 false로 같기 때문에
다음 계산 작업이 Schedule 되지 않습니다.
요약
소스 코드 분석이 길었습니다. 요약하자면 다음과 같습니다.
- 우리가 사용하는 useState는,
ReactCurrentDispatcher.current객체의 메소드- 이 객체는 React 코어 패키지 외부에서 주입 (react reconciler)
- 컴포넌트 mount단계와, update 단계에서 각각 다른 useState 구현체를 사용
- mount 단계 : mountState
- 관리할 hook 객체를 생성하고,
Fiber.memoizedState에 연결 - 초기값을 생성
dispatchAction함수를 생성- stale 상태에서 발생한 업데이트들을
hook.queue에 연결- 업데이트를 적용해본 eagerState와 현재 state 가 같다면, 스케줄링되지 않는다.
- render phase에서 발생한 업데이트들을
renderPhaseUpdates.queue에 연결
- stale 상태에서 발생한 업데이트들을
[초기값, dispatchAction]을 배열로 반환
- 관리할 hook 객체를 생성하고,
- update 단계 : updateState = updateReducer
- 기존 hook 객체를 복사하여 새 hook 객체를 생성하고,
Fiber.memoizedState에 연결 - state를 업데이트
- stale 상태에서 발생하여 쌓인 업데이트들 (
hook.queue)을 순차 소모하여 state 업데이트 - render phase에서 발생하여 쌓인 업데이트들(
renderPhaseUpdates.queue)을 순차 소모하여 state 업데이트
- stale 상태에서 발생하여 쌓인 업데이트들 (
- dispatchAction 함수는 mountState에서 만든 함수를 그대로 사용
[업데이트된 state, dispatchAction]을 배열로 반환
- 기존 hook 객체를 복사하여 새 hook 객체를 생성하고,
- mount 단계 : mountState
마치며
자연스럽게 사용해왔던 useState의 구조와 원리를 이제야 겨우 파악할 수 있었습니다.
앞으로 컴포넌트에서 사용할 때, 좀 더 세심한 구현이 가능해질 것 같습니다.
방대한 코드를 머리 싸매고 분석하는데 2주가 넘게 소요되었습니다..
큰 산을 하나 넘은 것 같아 뿌듯하고, 후련합니다.
궁금한 점이나 수정이 필요한 부분은 댓글 남겨주시면 감사하겠습니다.
모두 좋은 하루 보내세요. 감사합니다.
제 분석과 이해가 잘못되었기 때문임을 알립니다.